Quick Setup Guide
How to configure your platforms, keywords, and templates.
A Quick Note on Privacy: Isla Tracker works by locally "watching" a specific area of your screen to detect calls. It can detect text (Keywords), pictures (Images), or both.
The app does not store or share the information it sees on your screen. Your internet connection is exclusively used to verify your software license.
1 Selecting the Monitor Region
The program needs to know where to look. To save computer resources, it is highly recommended to select only the small area of your screen where the call status and Call ID appear, rather than the entire screen.
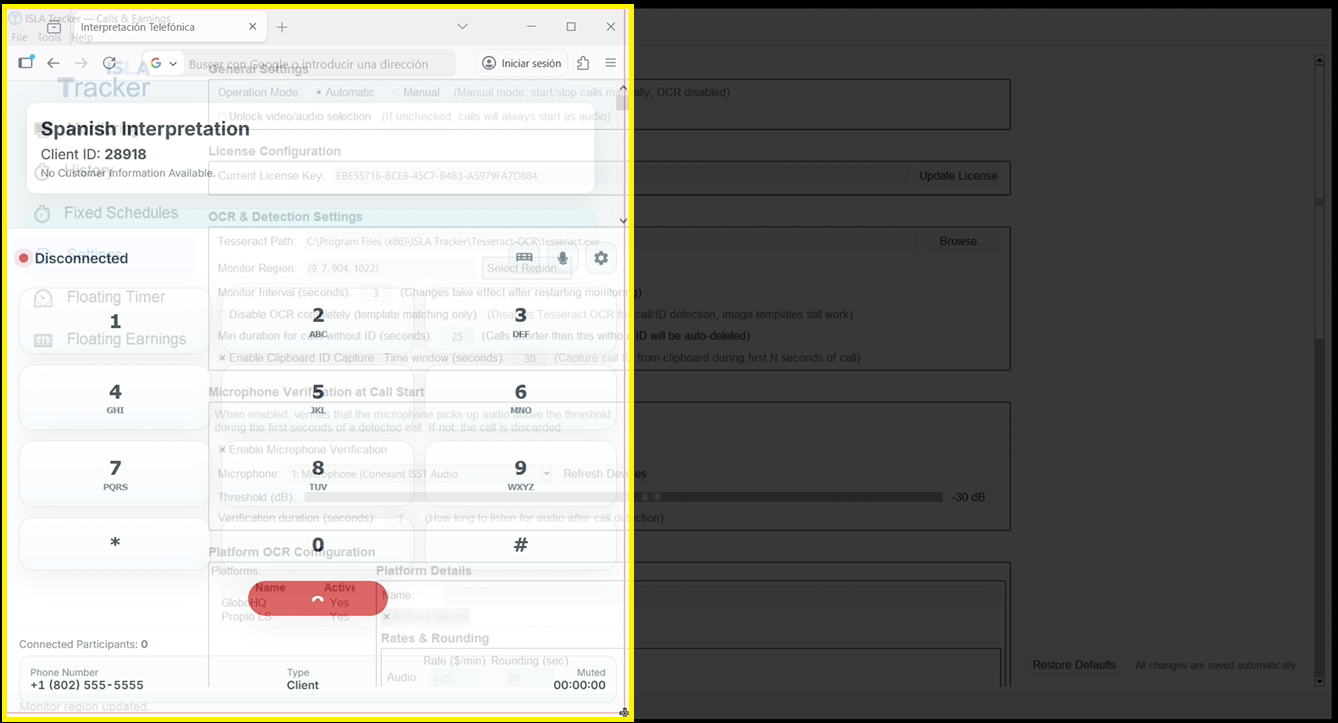
- Go to the Settings tab.
- Click on Select Region...
- Click and drag a box around your interpreter console (make sure to include the area where the "Connected" status and the Call ID appear).
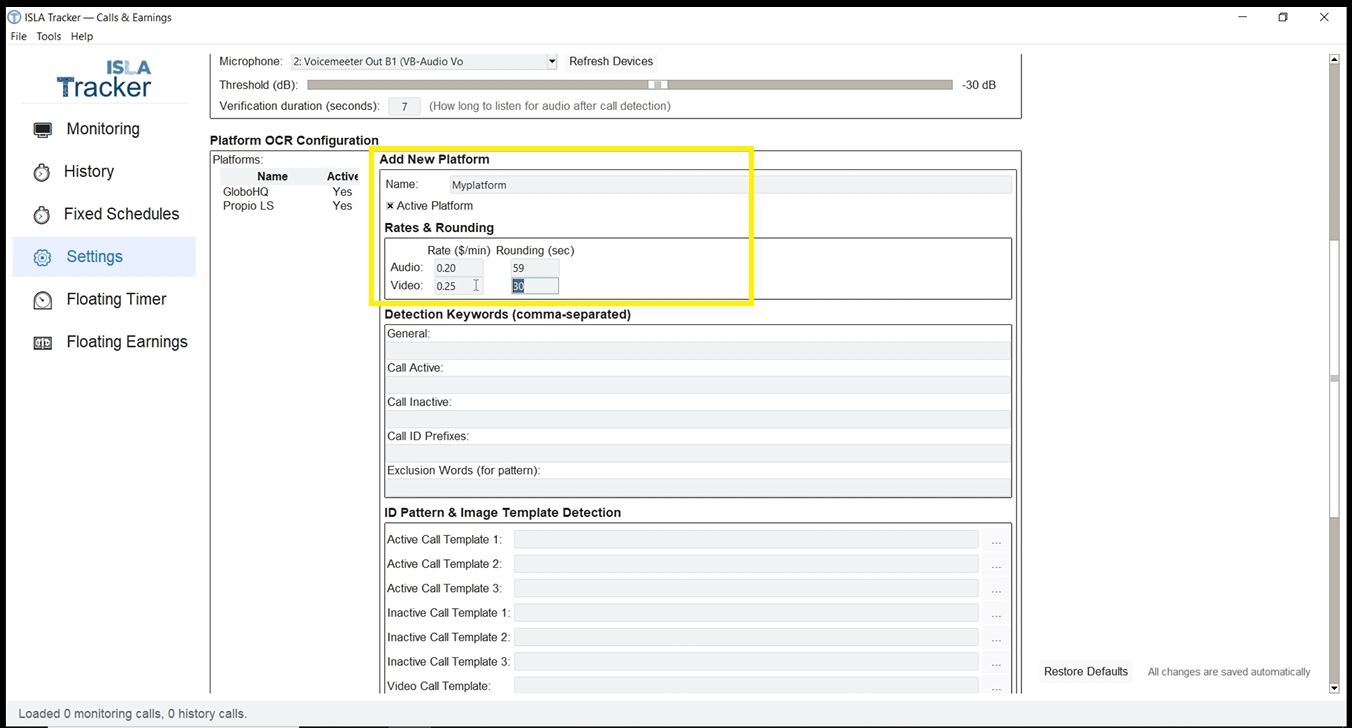
2 Adding a Platform & Rates
Tell the app who you work for and how they pay you.
- Under Platform OCR Configuration, click Add New.
- Name: Type the name of the agency (e.g., "MyPlatform").
- Rates & Rounding: Enter exactly how much you get paid per minute for Audio and Video.
- Rounding Rules: If your company pays you for the full minute after passing a certain number of seconds, enter that number here. For example: If they do not pay for incomplete minutes, set it to 59.
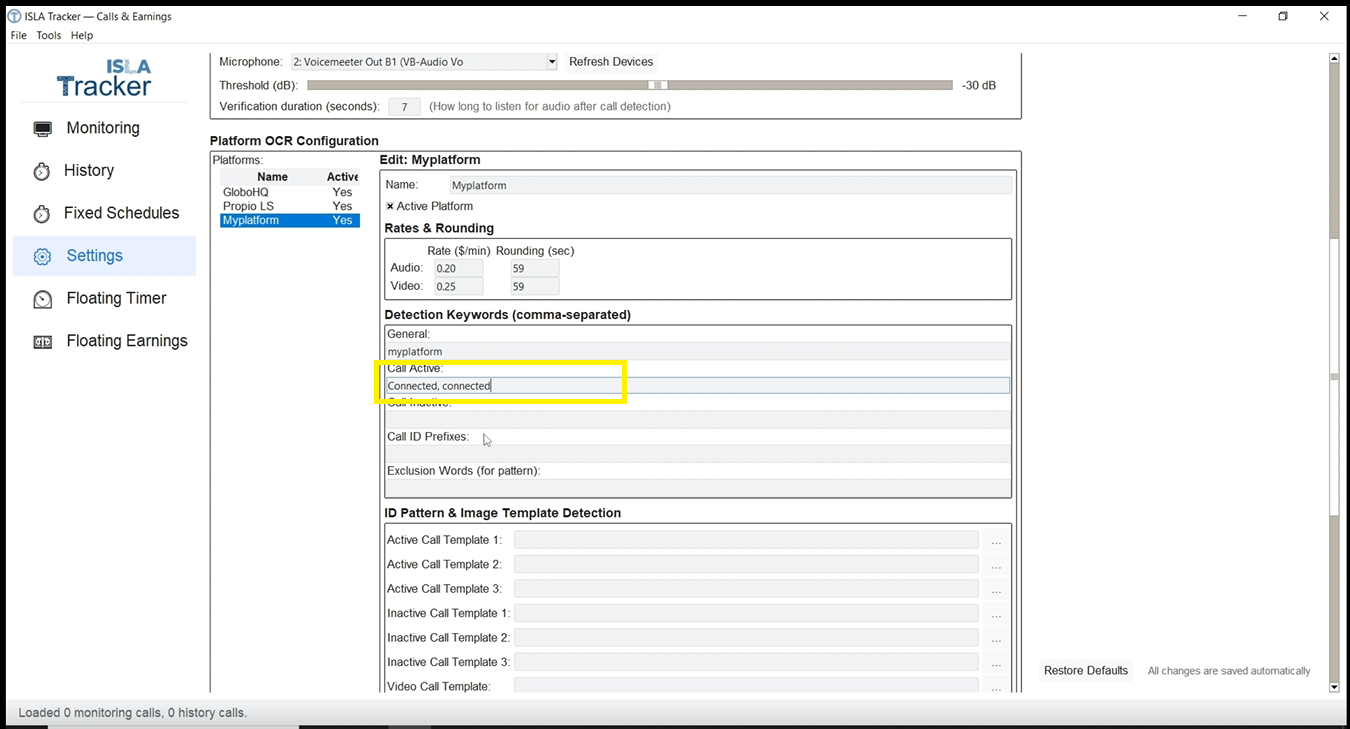
3 Setting Up Keywords
Keywords are words that tell the program when a call starts or ends. To avoid false positives, follow these two rules:
- The word must be clearly legible on the screen.
- The word must ONLY appear during the state you want to monitor (either active or inactive).
The program will identify the platform you are using based on the "General" keywords. For specific call states, if your console says "Connected" when a call starts, type Connected in the Call Active box. If it says "Disconnected" when it ends, type Disconnected in the Call Inactive box.
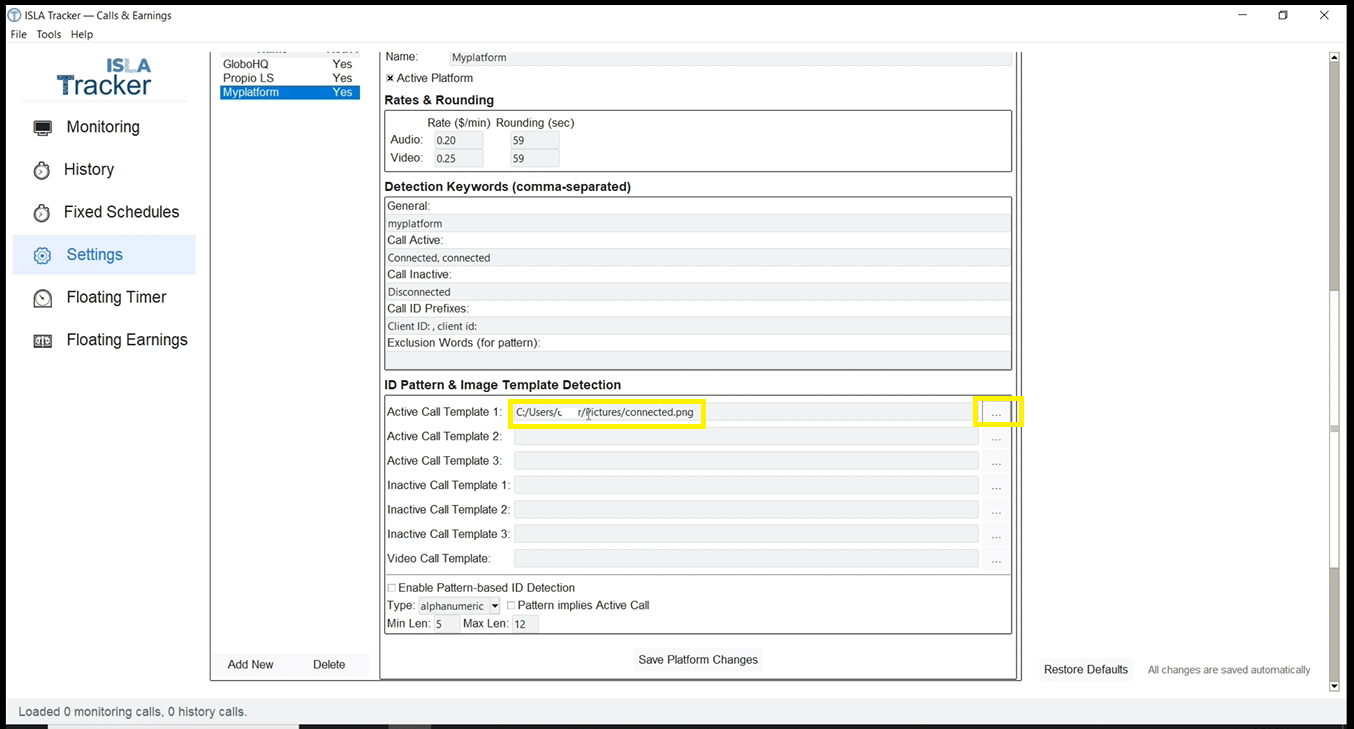
4 Using Image Templates (The Golden Rule)
Sometimes, detecting a specific image or button works better than reading text. For this to work perfectly, you must follow the Golden Rule:
The image template must be an exact match to how your screen normally looks.
If you take calls using Google Chrome in Light Theme with a 125% zoom, you must take the screenshot exactly like that. If you change your browser's zoom later, the template might not be recognized.
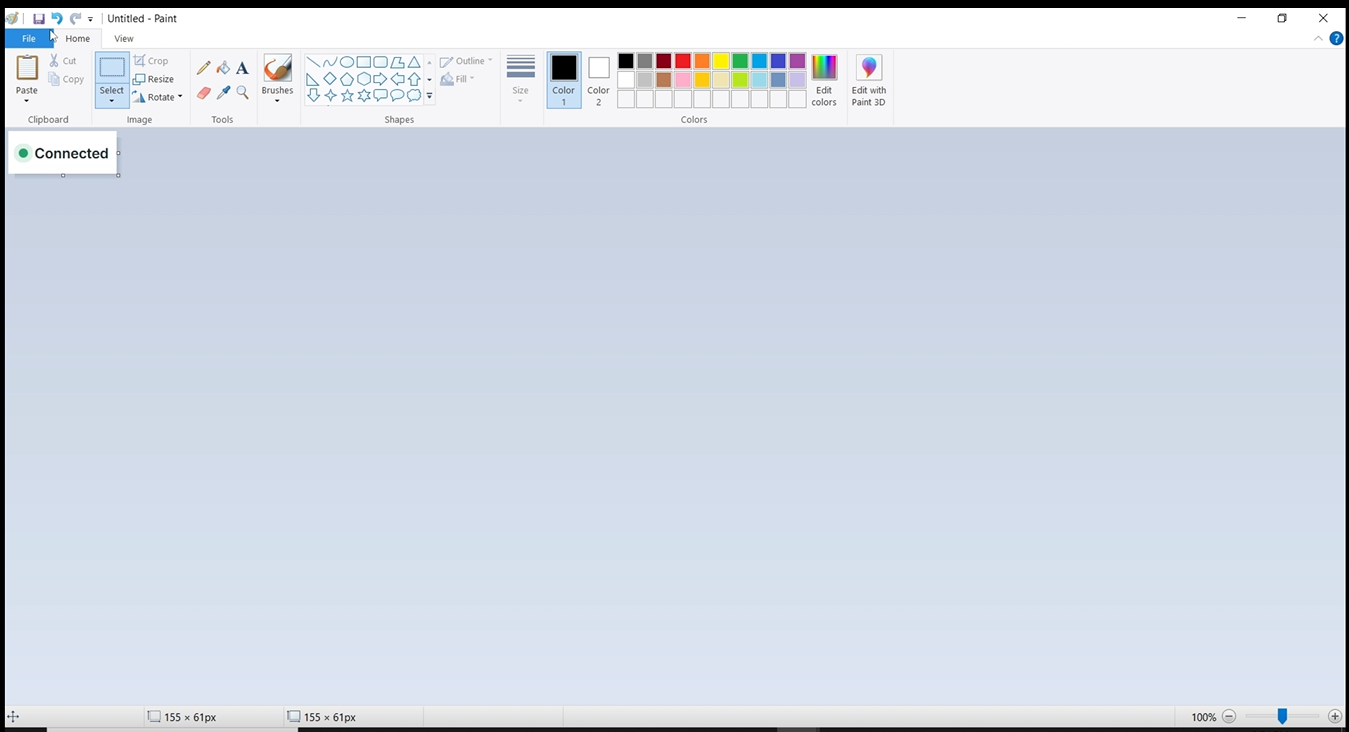
Windows Step-by-Step Guide:
- Open your interpreter console and wait for the button you want to capture (e.g., the "Connected" or "In Call" button) to appear.
- Press the Print Screen (PrtScn) key on your keyboard.
- Open MS Paint (or Photos) and paste the image.
- Use the crop tool to cut out only the specific button or status indicator.
- Save the cropped image in a folder you can easily find.
- In Isla Tracker's Settings, scroll down to ID Pattern & Image Template Detection.
- Click the "..." button next to "Active Call Template 1" and select your saved image.

5 Capturing the Call ID
Isla Tracker gives you four different ways to capture the Call ID to accommodate any platform:
Method 1: ID Prefixes
If your platform displays the ID with a label, like "Client ID: 12345", you can tell the program to look for that label.
- In the Call ID Prefixes box, type the label exactly as it appears.
- Important: If there is a space after the colon, include it! Example:
Client ID: - You can add multiple variations separated by commas to improve detection (e.g.,
Client ID: , Client ID:). Remember that this is case-sensitive!
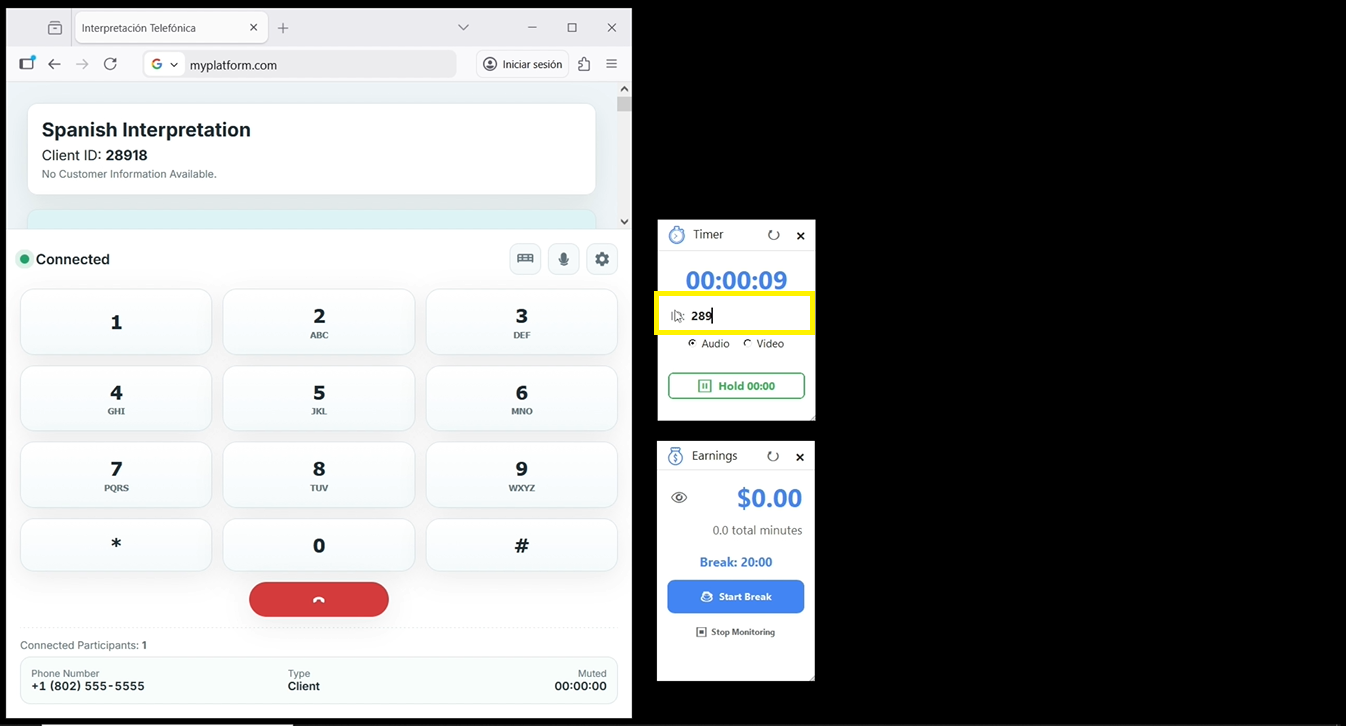
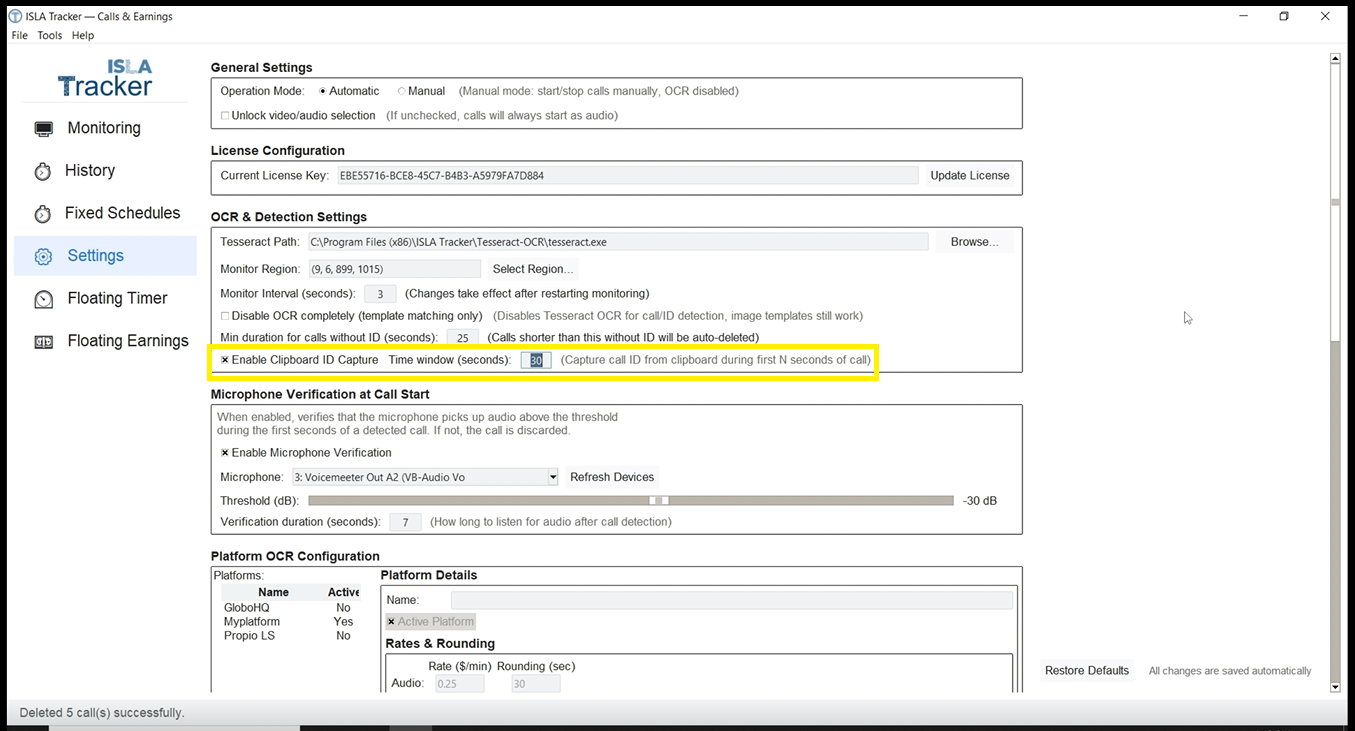
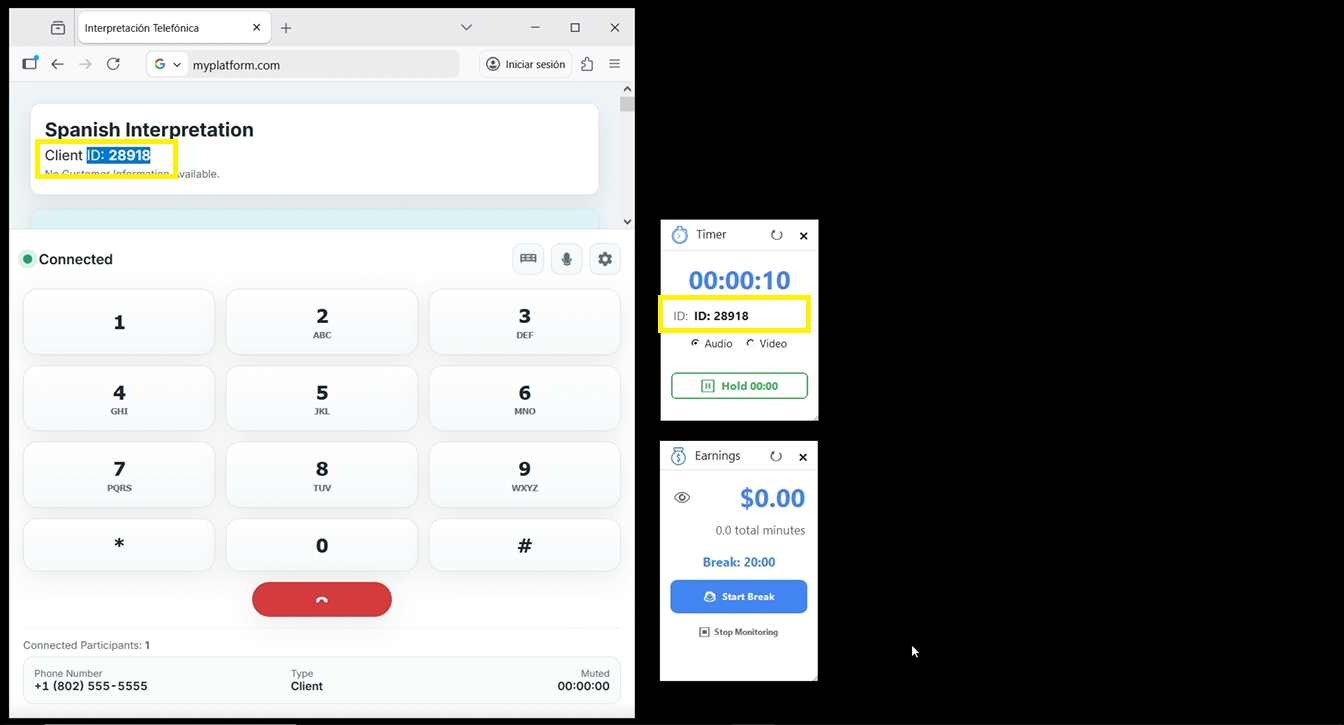
Method 2: Auto-Clipboard Capture
If you prefer to copy the ID manually but hate switching windows to paste it, use this feature.
- Check the Enable Clipboard ID Capture box in Settings.
- When a call starts, simply highlight the ID on your screen and copy it (Ctrl+C).
- The app will automatically save the first alphanumeric text copied to your clipboard during the first 30 seconds of the call. No pasting required!
Method 3: Manual Entry
You can always copy the ID manually and paste it directly into the Floating Timer Widget while the call is active.
Method 4: Pattern Detection (Use with Caution)
If you don't want to configure a prefix, you can check the Enable Pattern-based ID Detection box. The program will scan the entire monitored area for alphanumeric codes.
Warning: Be careful when using this! The program might accidentally grab other numbers on the screen, like Medical Record Numbers (MRNs) or account balances, instead of the Call ID.
You're all set! Click "Save Platform Changes" and start interpreting.